
One of the problems faced by mobile devices is that the warehouse for the most part cannot be expanded. You buy a phone with 128 GB of internal storage and you assume that it will be enough to keep you in the life cycle of that device.
But then time passes and you quickly discover that all the photos and videos you have taken, all the apps you have installed, and all the downloads you have saved are uploading. After one or two years of use, you will find that your device is running out of storage space.
What are you doing? Buy a new phone every time you see the available storage space running out and you are faced with the inability to store anything on your device. You can not take pictures, film the important moments or download any of the memes you would like to share.
What are you doing?
You can install a third-party app from the Google Play Store that promises to not only free up your device’s storage space, but also make your device run faster and make you a better person.
Remember the old saying, “If it’s too good to be true, is it enough?” It applies. Most of these third-party Google Play Store clearing apps are unwanted and should be avoided.
Fortunately, most of the latest iterations of the Android operating system make it pretty easy to free up storage space on your device. Let me show you how it’s done. I want to demonstrate on a Pixel 6 Pro running Android 12. The process should be the same (or similar) on your device. If not, it should only be a matter of a minor adjustment of the process to make it work.
Let’s dive down.
Clears stock
To clean up the storage space on your Android device, double-drag the notification shadow to access the Settings app. Find and tap Stock in the Settings app (figure 1).
figure 1
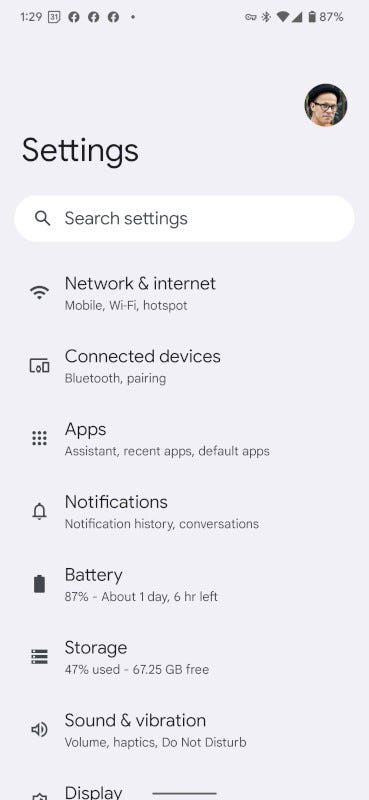
The storage record in the Android 12 Settings application.
In the Storage section (Figure 2), press Free up space.
Figure 2
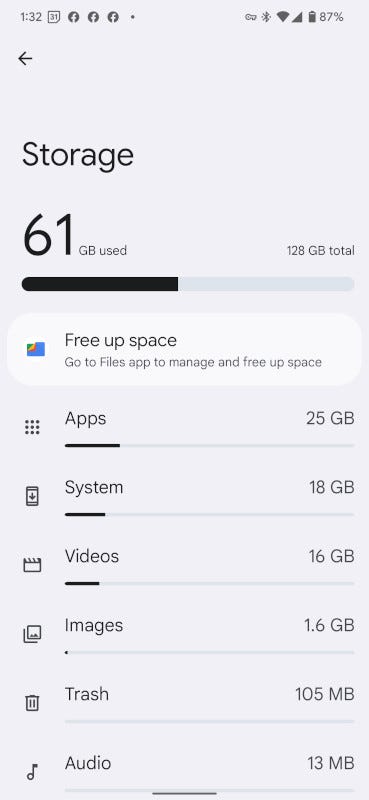
The storage section of the Android Settings app is where you get a quick overview of what is taking up space on your device.
In the resulting screen (Figure 3), you will find several file types that you can clean up (such as junk files, old screenshots, large files, media from specific apps, downloaded files, and media that have been backed up to your Google Drive account.
Figure 3
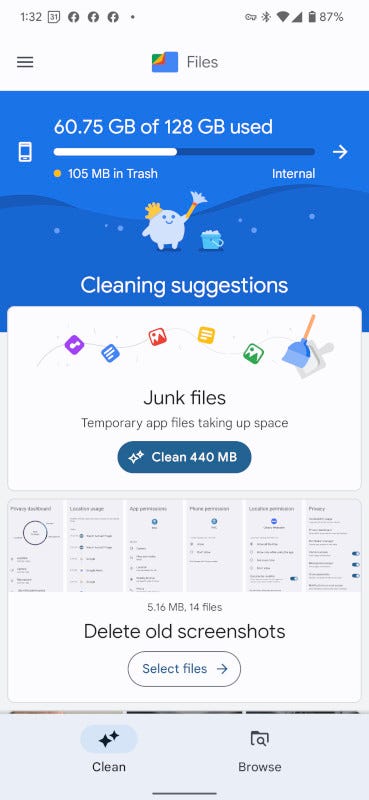
This is where all the cleaning takes place.
For unwanted files, simply press Clean X (where X is the number of MB or GB released after cleaning). For all other file types, tap Select files and then select the files you want to delete. Within each section you have the option to select individual files or tap the All Items circle to delete everything from that category (Figure 4).
Figure 4
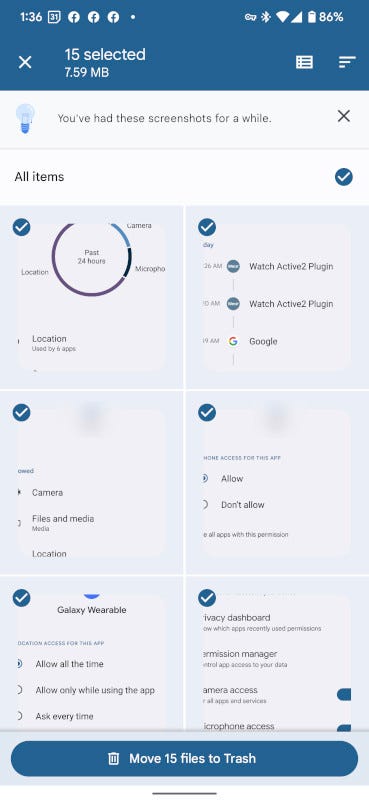
Deletes all my old screenshots from Android in one go.
After selecting all the files, press Move X Files to Trash (where X is the number of files you delete) and you are done. Go through the rest of the options on the Cleaning Suggestions page, and when you’re done, you should have significant storage space left on your Android device.
Congratulations, you have just made it possible to continue your mobile life without missing a beat, a meme or an adorable cat video.
Life is good again.