Screenshots are one of the most convenient ways to document an error or share a particular screen with someone. They save a lot of words and provide visual documentation of minor details you may forget.
Taking a screenshot on an Android phone is very straightforward, but did you know that you can do the same while using Android Auto? It requires more fiddling and you should not try to grab a quick snap while sitting behind the wheel – let your passenger take care of it. However, once you have completed a few initial tasks, it is quite simple to take a screenshot of your Android Auto screen. Read on to find out how to do it.
Enable developer settings
Before you can take a screenshot in Android Auto, you must enable developer settings on your phone. This step gives you access to lots of additional options that are not normally available directly from the box.
To enable developer settings, you must first connect your phone to your car using a cable or Wi-Fi. Once the connection is established, navigate to your Android Auto Settings. Depending on your phone, these can be found under Settings -> Advanced Features -> Android Auto on Samsung Phones, or Paired Devices -> Connection Preferences -> Android Auto on Pixel Phones. If you are not sure where they are located, the easiest way is to navigate to your phone’s settings and search for Android Auto.


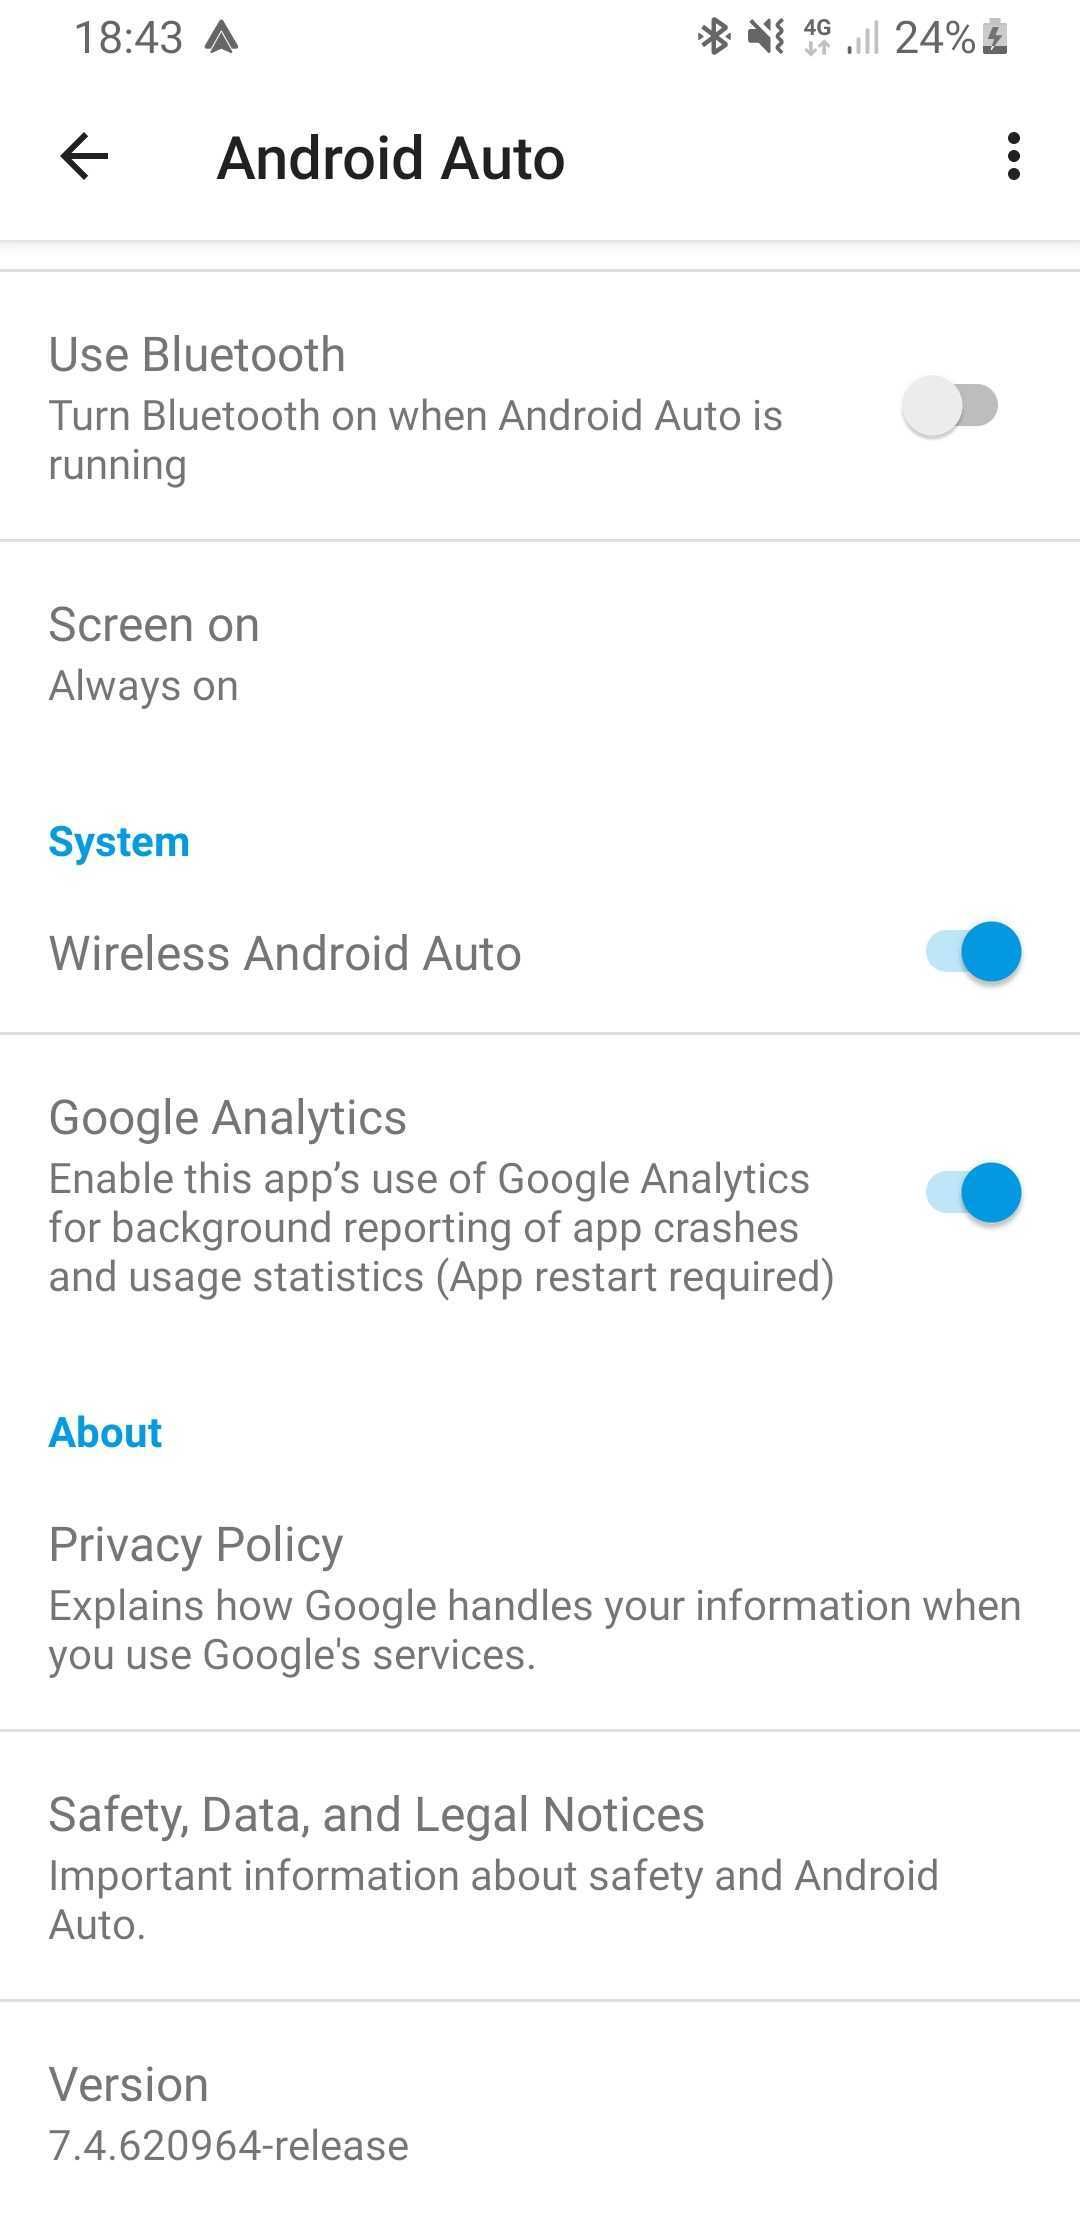
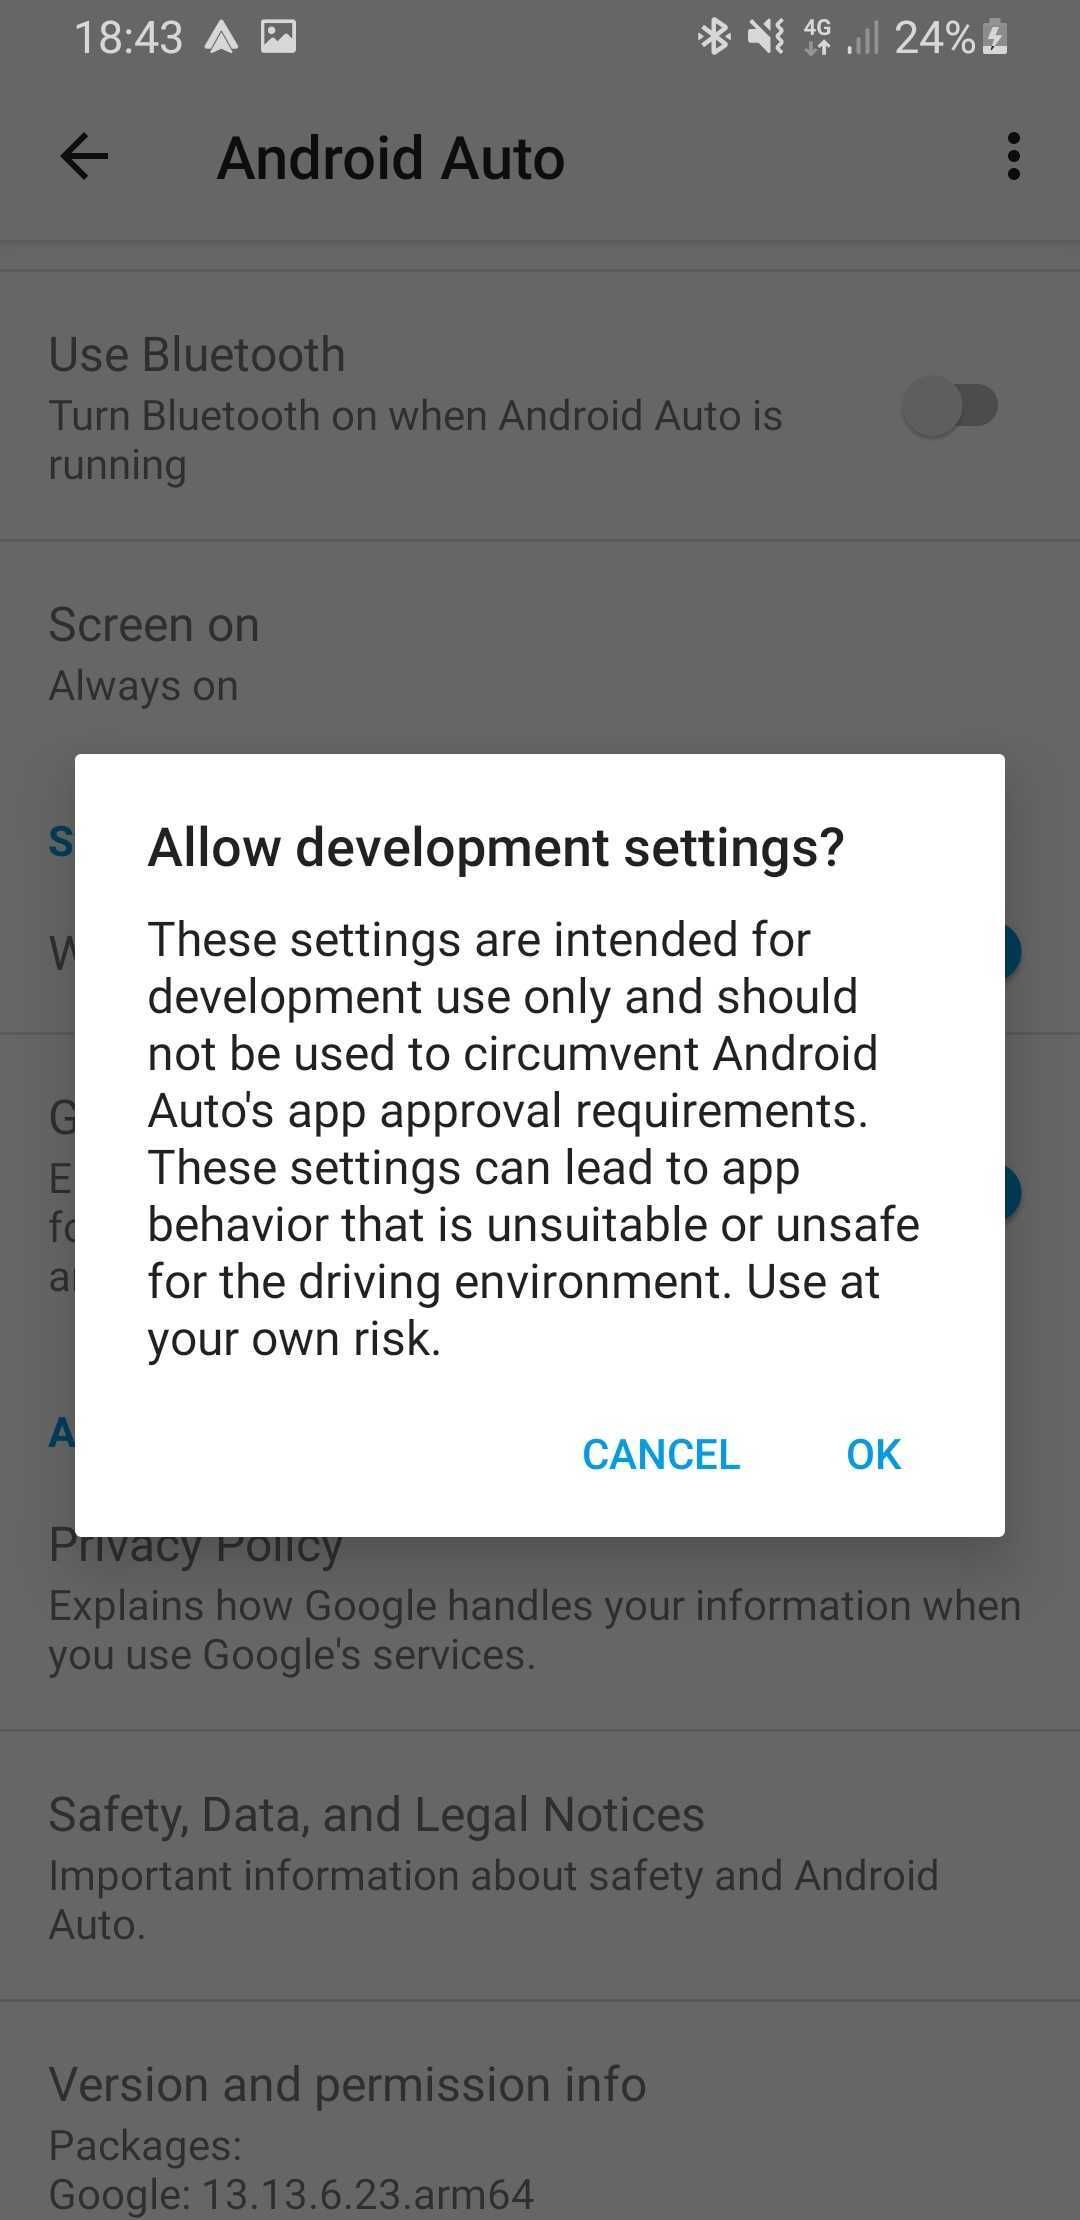
After opening the Android Auto settings, scroll down to the bottom of the page and press the version number ten times. You will then be asked to accept activation of developer settings.
It is best not to change any of the other settings unless you know what you are doing, so make sure you only access this menu to save a screenshot.
2. Take a screenshot
Once the developer settings are enabled, you can access them using the three-dot menu in the upper right corner of the screen.
You will see a setting that reads Share screenshot nowwhich, as the name suggests, lets you take a screenshot and share it with most of the apps installed on your phone.
Unfortunately, you will have to share the screenshot as soon as you take it, as there is no way to save it locally. This is clearly annoying, but an easy way to overcome this limitation is to save the screenshots to your Drive account. Whichever option you prefer, ieit is best to avoid tapping Always at the bottom of the screenas it would mean that you would always share Android Auto screenshots through the same app once you have selected it.
Taking screenshots with Android Auto can be inconvenient as you have to go through the extra set of activating developer settings. It can also be annoying to have to share the screen right after taking it, especially if you plan to take several of them before sending them. However, our solutions make things a little more bearable. If you are just getting started with Android Auto, you would like to add these apps to the mix.
Read Next
About the author

